
 Credit:
ChristinLola / iStock / Getty Images Plus
Credit:
ChristinLola / iStock / Getty Images Plus


Products are chosen independently by our editors. Purchases made through our links may earn us a commission.
If you've lost the battle to a avoiding basement floods you know that the first thing you need to do is to get the water out. Whether you’ve been dealing with a major flooding disaster or a more minor instance of flooding, a wet/dry vacuum is likely your best tool for mitigating damage.
Unlike regular household vacuums, wet/dry vacuums have the capacity to clean all types of messes, including saw dust, large scraps from home improvement projects, and, most importantly, standing water. Removing water from your home quickly is integral to preventing further damage to your home, and will help you to avoid costly repairs. While a wet/dry vacuum may seem intimidating at first, once you know some best practices for how to best use your new tool you'll be glad you bought it.
Related content
-

The Best Shop Vacuum Cleaners of 2024 best-right-now
-

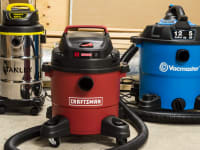

Here's how to use a wet/dry vacuum
Tools you need:
- A wet-dry vacuum
- Hose attachments
- A dry cloth
Step 1: Make sure it’s empty
Just because your vacuum can handle both dry and wet messes doesn’t mean it's a good idea to mix the two. Make sure the drum is completely empty before you start filling it—if it has water in it, wipe it out with a rag, and if there are still dry scraps, dump them into the trash.
Step 2: Check the filter
If you’re using your wet-dry vac to clean a dry surface, check that the filter has been correctly placed. The filter prevents dust from blowing out of the top while you’re cleaning, so you’ll thank yourself for paying close attention to this detail. For wet surfaces, however, you’ll need to remove the filter entirely. Liquids will damage filters, and you could potentially ruin your vacuum if you suck up water before removing the filter.
Step 3: Pick the right attachment
Every shop vac attachment has a purpose. Wet surfaces are easily cleaned with attachments that lay flat on the ground, while cleaning large piles of debris will call for the biggest attachment in order to save time. Alternatively, if you're cleaning a surface coated in pet hair or trying to get into nooks and crannies, you’ll want to use a brush attachment.
Step 4: Vacuum!
When your drum is empty, your attachment is in place, and you've discovered a newfound excitement for cleaning, turn the machine on and start vacuuming.
Step 5: Empty the bin
In order to keep your household tools at their optimal performance you'll need to clean them accordingly. Don’t leave a mess sitting in your wet/dry vac, telling yourself, “I’ll clean it out next time.” Not only will that make for a stinky vacuum but it can affect the lifetime of your vacuum. Dump dry debris into a trash bag before returning your wet/dry vac to storage. If your drum is filled with water, remove the top of the vacuum, carry the base outside, and dump the water into a spot on your lawn. Bring the vacuum back inside, reattach the filter, and store it away.
Tips for using a wet/dry vac
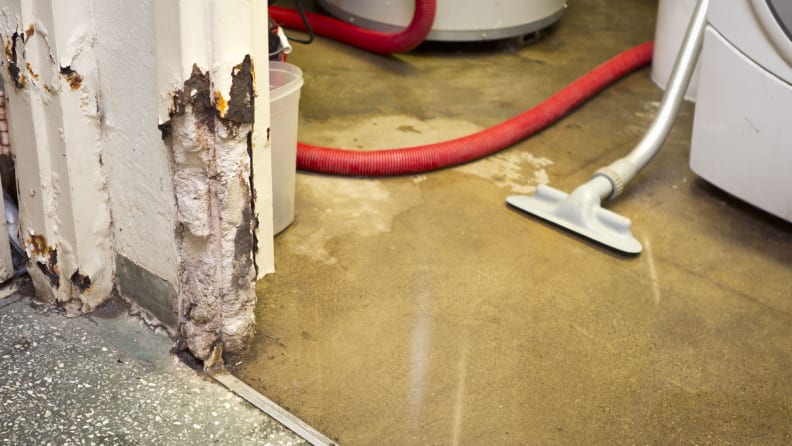
Whether it's due to a natural disaster or a leaky washer, wet/dry vacs can help you mitigate some of the damage from flooding.
Your wet/dry vac will be a lifesaver, so make sure you take good care of it. Aside from following the steps above, there are a few more tips you can use to extend the life of your new favorite home improvement tool.
Clean it thoroughly once a month
As with any tool that holds water, mildew can grow inside your vacuum, so treat it to a good scrub at least once a month to ensure it stays happy and healthy. Using dish soap and warm water, scrub the interior of your wet/dry vac, making sure to get into the corners.
Store it where you use it
Wet/dry vacuums are generally fairly heavy. If you’re sucking up puddles of water or home improvement debris, that drum will fill quickly—not to mention water is incredibly heavy, even if your drum is only filled halfway. For this reason, you'll want to store your wet/dry vacuum in an area where you know you do the most vacuuming, like in a basement or workshop.
Stick to vacuuming water
Just because you can now vacuum spills with your wet-dry vac doesn’t mean you should. To clean spilled milk, for example, you’d need to get out your vacuum, remove the filter, select an attachment, vacuum the milk, dump it out, then clean the entire tool thoroughly before storing again. Trust us, it’s not worth it, nor is taking a gamble on old milk smell. Use a paper towel instead.
Take advantage of all its features
Wet/dry vacs are sturdy, so don’t be shy about using them! For instance, did you know you can use a shop vac to clean out your fireplace at the beginning of the cold season? It's a great way to get rid of those ashes without ruining your standing vacuum (or having to get on your knees and shovel them all out). The top of your wet/dry vacuum can even be used as a leaf blower with the right attachment. From your lawn to your linoleum the number of unexpected uses a wet/dry vacuum can fulfill is pretty impressive. In fact, we can’t think of a more multifunctional appliance to have on hand. And, while you could always take advantage of your local hardware store’s rental policy, we think it’s worth investing in a wet/dry vacuum of your own.


The product experts at Reviewed have all your shopping needs covered. Follow Reviewed on Facebook, Twitter, Instagram, TikTok, or Flipboard for the latest deals, product reviews, and more.
Prices were accurate at the time this article was published but may change over time.