Categories
DIY How-to Making

Replacing the Logo on a New Era Baseball Cap

My brother recently suggested I could upgrade my hat game. He was right: the crusty, adjustable-strap White Sox hat I’d worn for years was due for replacement. I liked the fit and look of the New Era 59Fifty wool ballcap he lent me. But I didn’t care to advertise for a team (a.k.a. company) I don’t care about, nor did I wish to invite small talk about sports.

My mission: replace the logo on an official New Era baseball cap with one of my own design. It was a fun mixed-media project, part art, part craft, and part hack.

I ordered a gently-used cap from eBay. If you don’t care about team logo, the choices are vast! I purchased a 1990s vintage black hat with a black Yankees logo for $13.

A black vintage Yankees hat, untouched
The original hat, ready for surgery

First I removed the existing logo. I used a seam ripper to slice threads and pliers to yank on loose ones. When removing logos from other garments, I rip stitches from the back, but that wasn’t possible here due to the white backing liner on the inside.

Many of the threads have been picked off
Going…

This part was slow going. All of the yanking with my dominant hand bent the cap slightly. I probably should have done more slicing and snipping and less brute force with the pliers.

Going… (this was messy)

The result wasn’t perfect. A few threads from the logo remained and I pulled out a little material from the hat itself. But it sufficed once I covered it up. I wonder if contrast would have helped. Would a white logo on black hat work better (because the white logo stitches would be easier to selectively remove) or worse (anything left over would stick out)?

Gone! The outline visible here can’t be seen under the new logo.

Next I made the new logo, using the community laser cutter at All Hands Active. I downloaded the Extinction Symbol and loaded it into Lightburn, which auto-traced the outlines. I was ready for the laser.

I cut the logo out of corrugated plastic sheeting, often called Coroplast. Most plastic is unsafe to cut on a CO2 laser, but Coroplast is okay. In Ann Arbor, unscrupulous companies print advertisements on this plastic and illegally place them in the public right-of-way near highway off-ramps and busy intersections.

I considered 3D-printing the symbol. That way I could have controlled its depth – the Coroplast stock is a tiny bit thicker than a New Era-style logo – and added touches like tiny holes through which to sew the logo to the hat. But that would have taken a while to design and print. And I liked the spirit of reusing roadside litter.

The laser burned nearly through and I finished it with an X-ACTO knife.

extinction symbol burned into a plastic sheet
After the laser cutter
shape cut out of plastic sheet
Trimmed with the knife

Next, I wrapped the logo. I used a small bundle of embroidery floss, I believe a 8.7 yard bundle of 6-stranded DMC 25. That was exactly enough for this project.

beginning to wrap the plastic with embroidery floss
Wrapping underway, trying to keep the knots on the back

A crafty friend at Workantile suggested I wrap the logo before attaching it to the hat. Brilliant!
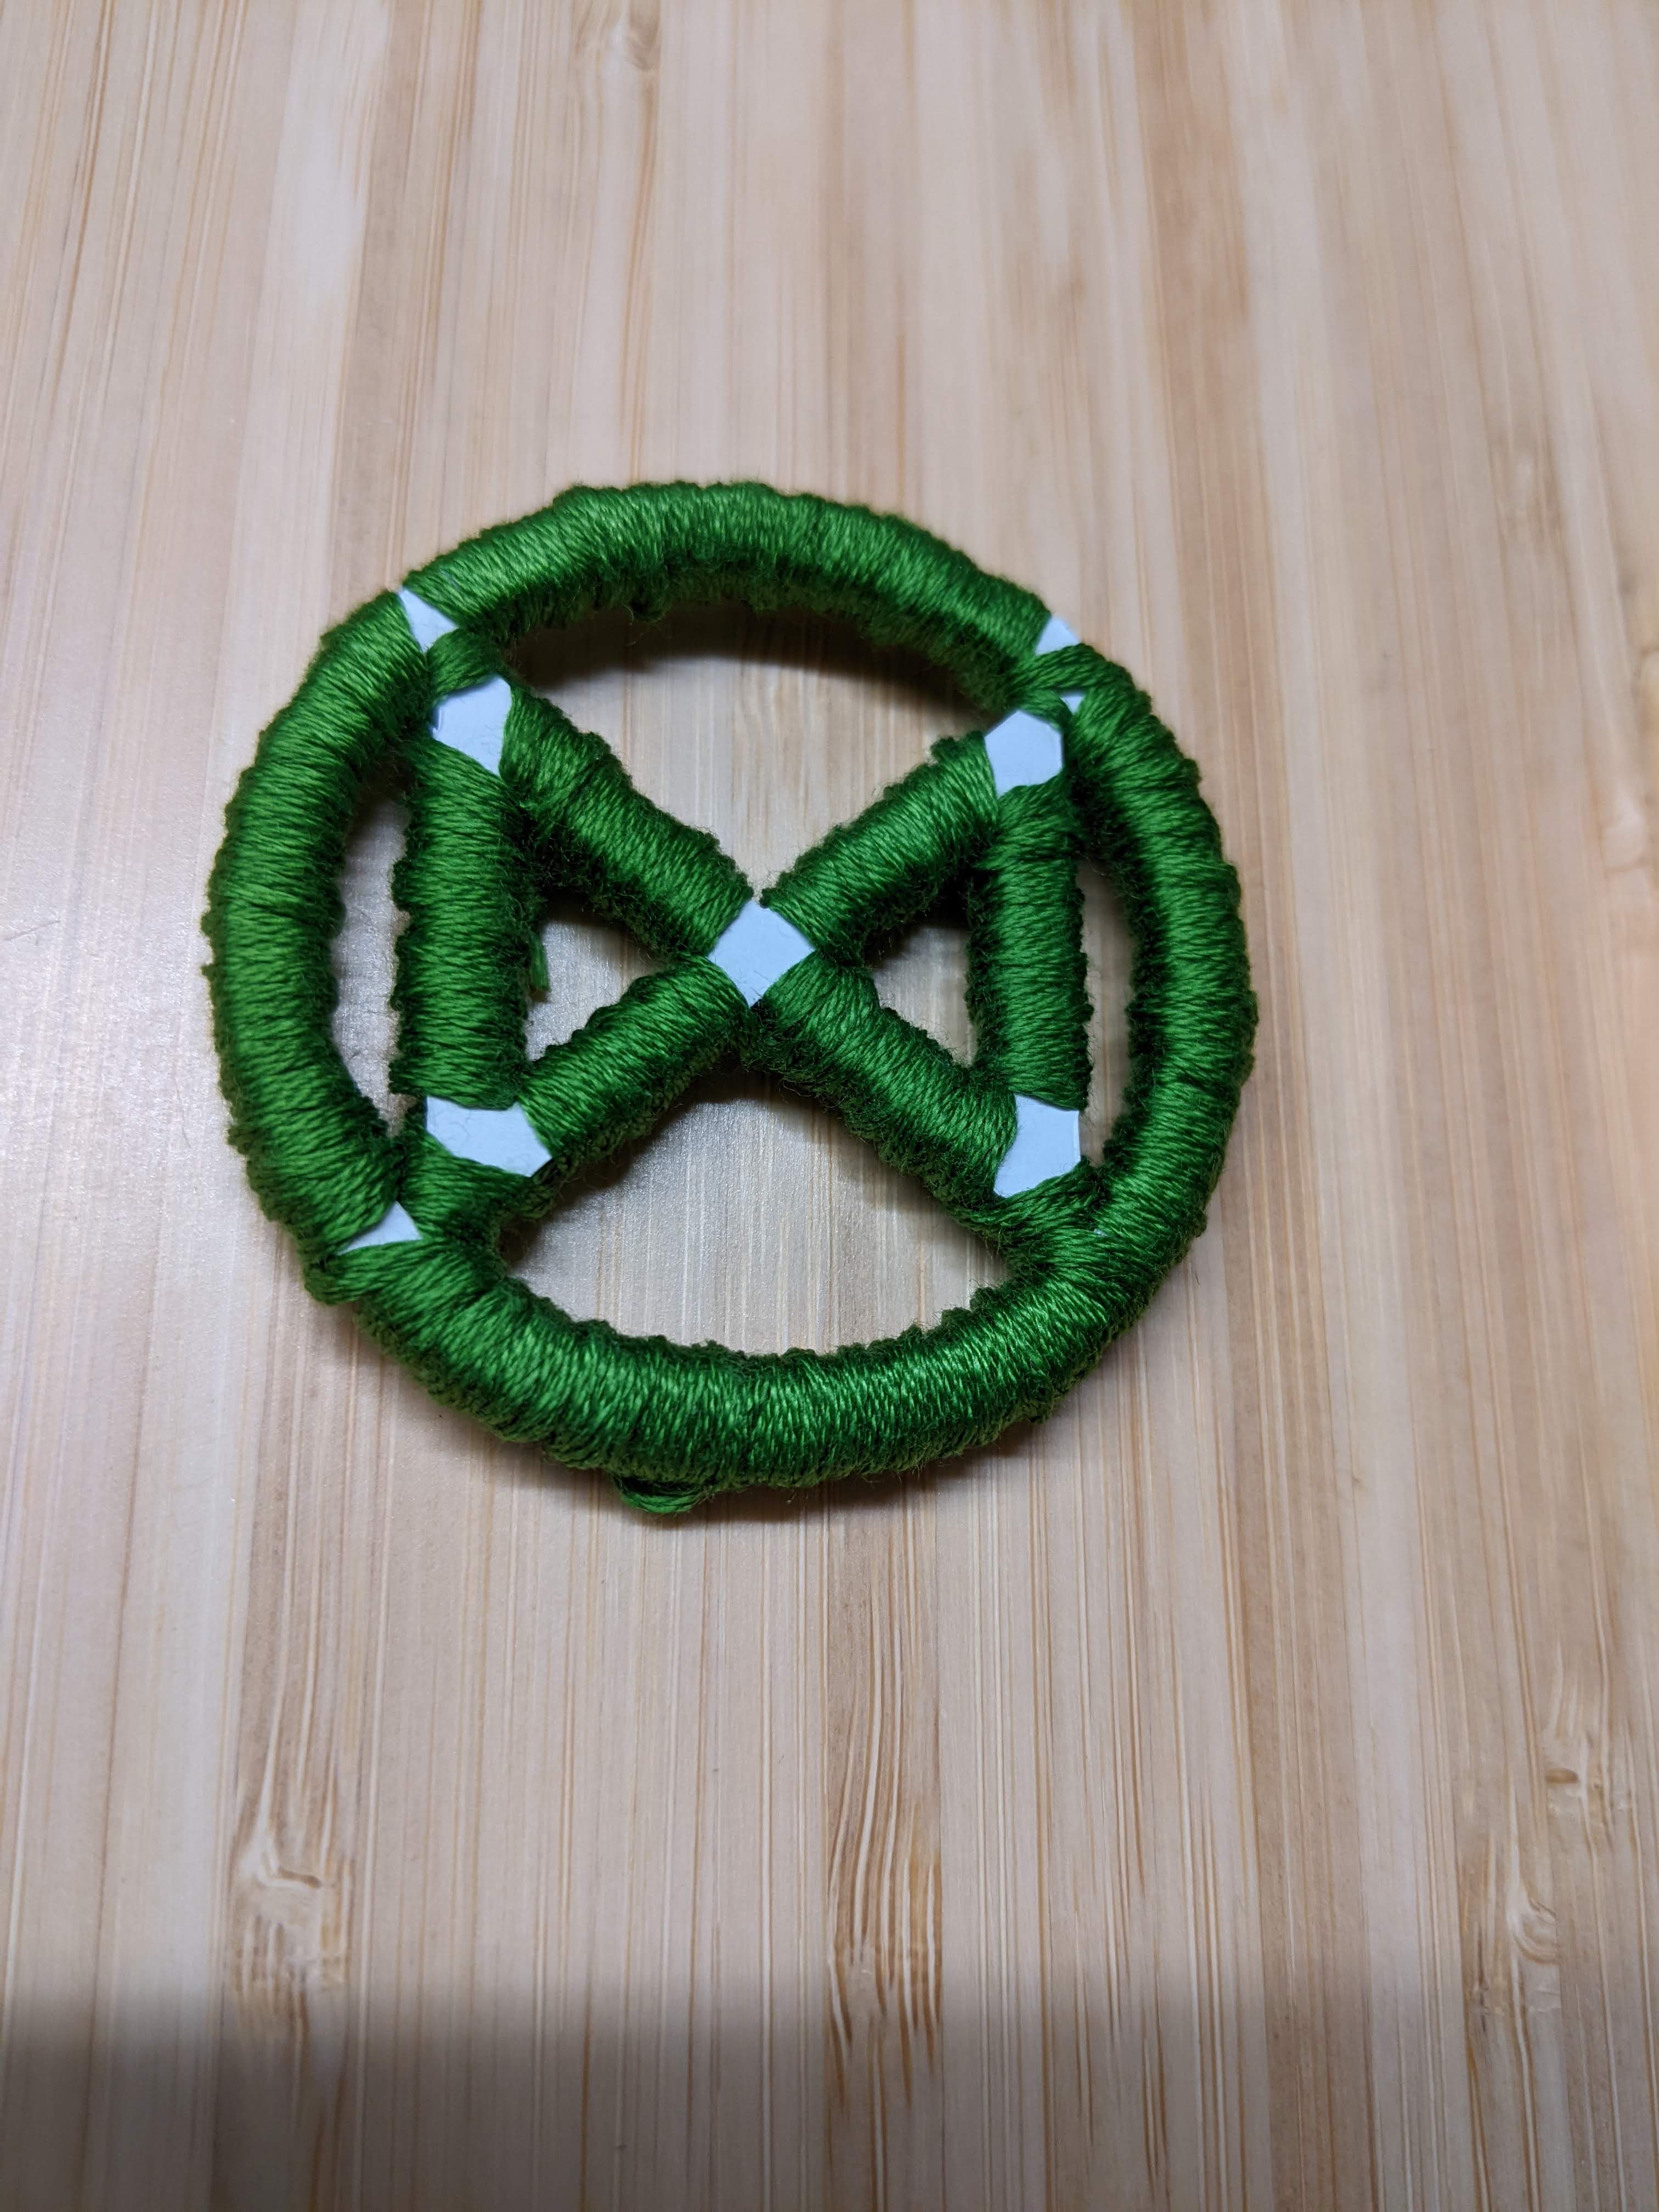
logo almost entirely wrapped
Mostly wrapped
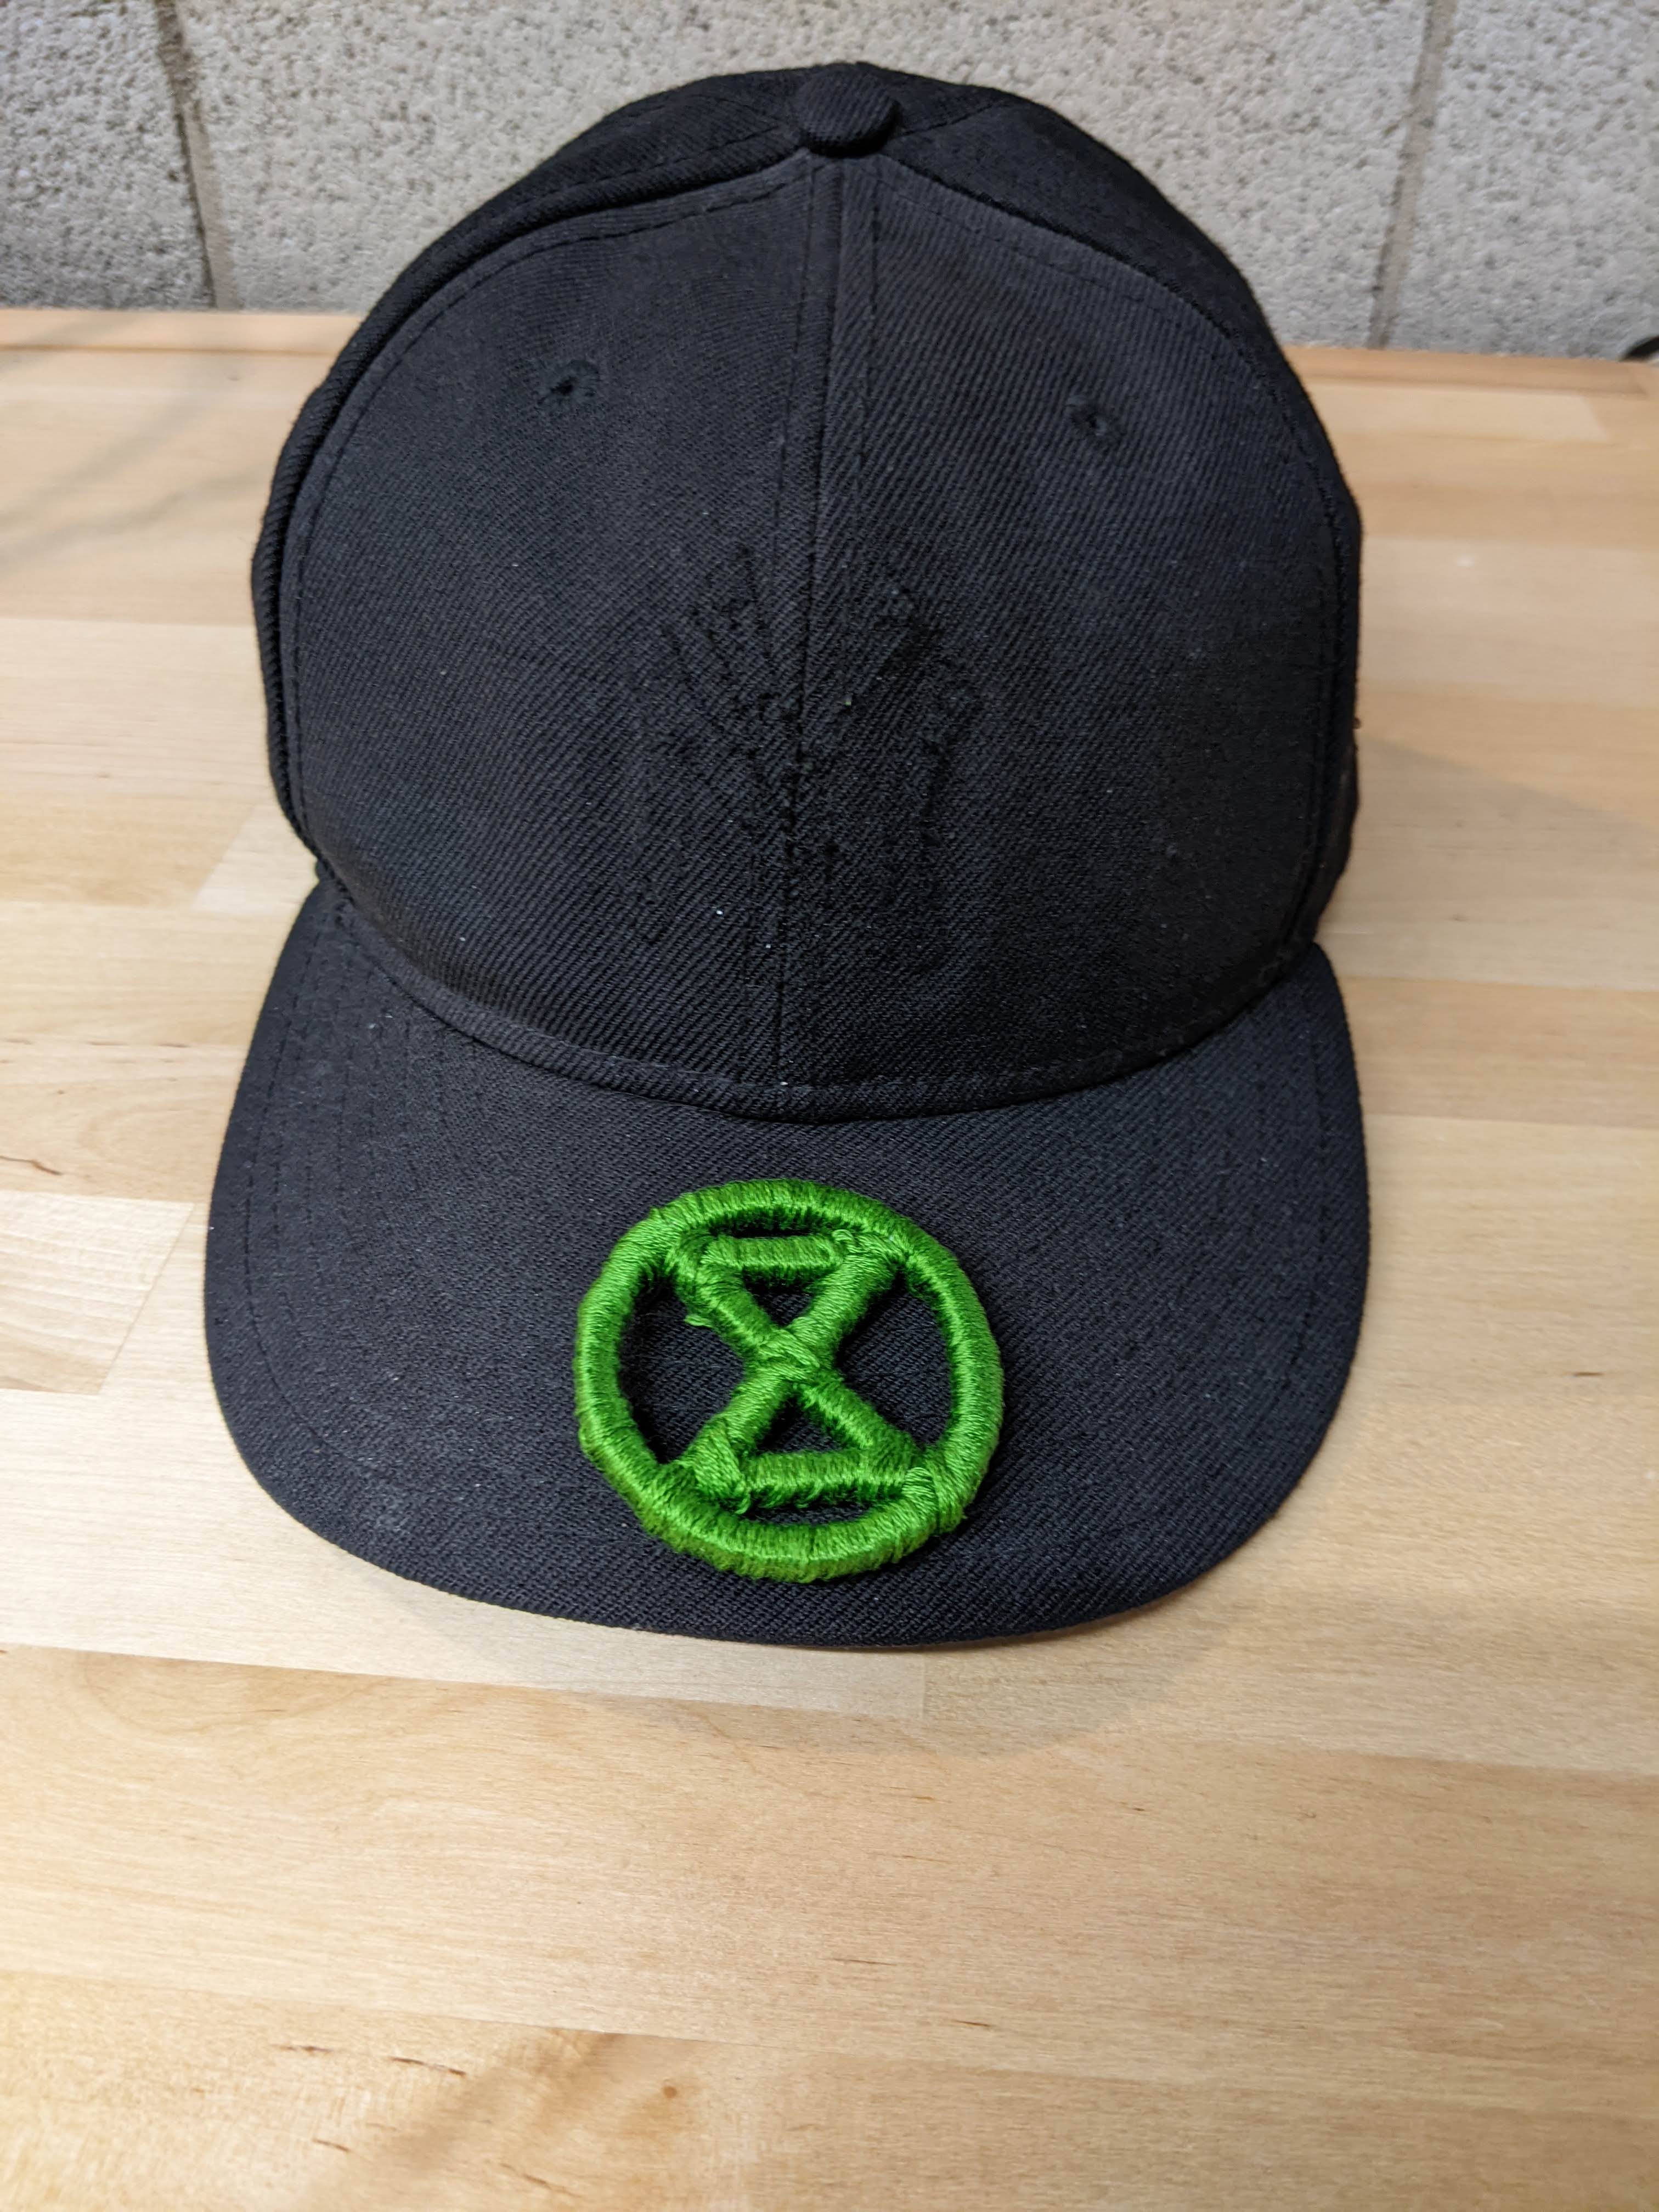
fully wrapped logo sitting on the brim of the hat
Fully wrapped and ready to mount

I got it almost entirely wrapped, then tacked it onto the hat in a few places with the same thread. Finally, I completed a few tricky wrapping stitches that were easier once the logo was anchored to the hat.

The wrapping is imperfect and in one spot I pulled too hard and compressed the plastic. But from across the room it passes for a commercially-made hat!

The completed hat with logo finished
The finished product

I’m pleased with how it turned out. I have a comfortable, well-made hat and instead of promoting a sports franchise, I’m starting conversations about living during the Sixth Mass Extinction. Seeing the logo reminds me to think timefully.

If I hack another hat, I’ll consider 3D-printing the symbol to try to precisely match the depth of the hat’s original logo. And I’d start with a hat that isn’t black-on-black so the New Era logo on the side pops: I enjoy the tension and confusion that comes from this being a mass-produced object with a hand-made logo.

Categories
DIY Repair

Tips for Fixing a Dripping Widespread Sink Faucet

These are notes from Jan 2023 me to future me – here’s what you need to know:

  • To fix the 2007 Pegasus [is that a Home Depot brand?] widespread two-handled faucet on the upstairs bathroom sink
  • About fixing leaking sink faucets more generally

Diagnosis. Figure out if the hot or cold is leaking by turning off the water supply lines one at a time.

The part to change to stop the dripping is the cartridge (in a one-handled faucet) or, in this widespread two-handle bathroom sink, the faucet stem. It comes with a new retaining clip. Cartridge vs. faucet stem is mostly a matter of terminology.

Categories
Biking DIY Gardening

The biggest thing I’ll ever tote on a bike

I have carried a lot of things on my cargo bike. It’s become a game: what unlikely object can I next transport via bicycle? I clearly remember the rush of hauling my first big item, a suitcase, five years ago. That load was liberating then, pushing the boundaries of what I could do, but now I wouldn’t think twice about it.

I returned this suitcase to Macy’s and went shopping at Briarwood Mall. October 2016.

Yesterday I reached my high score in this game, if you will. Like in a heist movie, I sought to pull off the world’s greatest job before taking it easy evermore. And I did it.

I’m not done hauling – I’ll still carry things on this bike every day – but during the record-breaking ride I swore that if I made it home without incident, I’d not try anything this big again. This is the tale of hauling a 275 gallon plastic tote, in a metal pallet, six miles across Ann Arbor.

Categories
DIY How-to Making Nature

Making a coat rack from a buckthorn log

This project hit many of my interests:

  • Eliminating buckthorn, a nasty invasive species
  • Reuse / making things from leftovers
  • Amateur woodworking
  • Contributing to Workantile, the co-working community I’m a part of

It turned out nicely. Here’s a writeup and some photos.

The rack

It started when I was biking home with groceries from Meijer and encountered a big pile of buckthorn by the side of the road, culled from Greenview Nature Area and awaiting pickup for composting. The biggest trunk was a decent sized log. The bike was already heavily laden but fortunately, a log is a different shape than grocery bags so I found a spot for it:

a log on a bike
This was surprisingly easy to haul

For a while I’d been interested in woodworking with found wood, especially buckthorn. I take pleasure in removing it and would enjoy that even more if I could turn it into things. I asked my friend and de facto woodworking coach Chris how I should go about processing logs. Buy a bandsaw? Build one of those circular-saw-converted-to-chainsaw DIY mills I saw on YouTube? Both seemed excessive.

Categories
DIY Making Repair

3D-Printed Piece Saves My Cuisinart Food Processor

The utopian vision of 3-D printing and communal knowledge sharing came true this week, in one small instance. For years I’ve loved the idea of 3-D printing a replacement component when some plastic bit snaps in a machine I’m using. Especially when the manufacturer doesn’t sell that widget and intends for you to junk and replace the whole thing. But in practice, I’ve not found myself in a situation where that would be viable…

Until this week. Last year my mother upgraded her food processor and handed me down her previous model, a Cuisinart DFP-14 (DFP-14BCN to be precise). The machine had seen years of hard work and at last, the little plastic interlock piece at the nexus of the complicated safety mechanism broke.

I spent maybe 90 minutes last weekend trying to fix it. This involved cutting a reinforcement plate out of scrap plastic, epoxying it on, and mounting it with a machine screw (part of the plastic housing had shattered, too). I had tried my best but it was not going to last. Here’s the kludge fix at the point where I called it quits:

The black plastic layer is my addition. This won’t hold up for long.
Categories
DIY How-to Making

Making a wallet out of a bag of chips

I’d liked the idea of making a wallet out of a empty bag of potato chips, but didn’t know how to use a sewing machine. I finally bought one off of Craigslist this winter and am figuring it out. A sewing machine unlocks some projects I’d long been curious about – this is one of them.

I followed the steps from this Instructables guide and it turned out pretty well! I would make this project again. It felt like it dragged on, my 10 year-old helper and I took our time, but if doing this again I could move much faster and complete it in an hour or two. I wonder what the durability of the wallet will be. I plan to use it, so will find out.

It’s fun to think about what part of the design you want on the outside
Categories
DIY How-to Making

Homemade wood toaster tongs

I recently broke a pair of toaster tongs I’d been given. They looked very much like this set ($10):

Magnetic Wooden Toast Tongs
Image belongs to the Vermont Country Store

Complete with the laser-etched phrase and magnet to grip a metal surface. Made from a single piece of wood, with thin tongs, one of the tongs eventually snapped. I generally stick to rough, practical carpentry, but saw these plans from Rockler for DIY kitchen tongs that made this finish carpentry project seem within my reach. And it was! Now I’ll have more confidence tackling polished projects going forward.

I’m very pleased with how mine ended up:

Not perfect, but the imperfections are tolerable!
Categories
DIY How-to Making Parenting Repair

DIY non-slip soles for footed pajamas

I’ve handed down a few pairs of cozy footed pajamas between my kids. Along the way the soles lost whatever non-skid properties they had and became very slippery. We got them out this fall to keep my two-year-old cozy. He was cozy … and he slid all over on our slick floors, wiping out a few times. Neither slips nor cold bare feet would do. It was time for DIY non-slip soles.

I outfitted two pairs of Carter’s footie pajamas. Both attempts turned out great:

Try to slide in those!

Materials: I used a discarded bike inner tube that could no longer be patched. If you don’t have one, you might be able to score them from a bike shop or repair co-op. I also used heavy-duty Sashiko thread and needle, but I expect you could do this with any needle and thread.

Process:

Categories
DIY

Hosting migration complete

For a couple of years, I’d meant to migrate my domain name and host to better companies. Now I have! I think everything on my blog made it through: posts, comments, images, subscriptions. Please let me know if anything seems off. Feeling proud of myself for navigating nameservers, file permissioning, etc.

The only intentional change is that I’m trying out the latest theme from WordPress, “Twenty Twenty.” Plus I have the latest versions of WordPress and PHP and my site now supports https.

After surveying my options, I went with A2 Hosting (that’s my referral bonus link, why not). They had good reviews from friends and reasonable pricing. As a bonus, my blog is now locally-hosted: A2 is shorthand for Ann Arbor, looks like they’re based over on Hogback Rd.

Categories
DIY Gardening How-to ruminations

Building a hugelkultur mound in a city backyard

This was a leap-of-faith project during Michigan’s bleak COVID-19 “shelter-in-place” period. I’m documenting it here as a plan for building a hugelkultur bed on a small city lot as well as to preserve a pleasant COVID-19 memory. Behold the thriving hugelkultur mound:

It’s exploding with vegetables – see below for pictures of the hill itself

Hugelkultur is a permaculture concept where you pile up organic material (logs, leaves, compost, etc.) and then grow a garden on top of it. Here is a good explanation of hugelkultur and its benefits. It’s also a fun word to say. We refer to our mound as “the hugel” [German for hill].

This was the perfect COVID-19 project. Under lockdown in April, we had nowhere to go. I was spending lots of time with my kids at home during the day. And I wanted to be outside. Building a garden bed with the materials at hand was a small act of protest against the feeling of being dependent on a global supply chain whose fragility had suddenly been exposed. I couldn’t easily get soil or lumber delivered for a conventional raised bed. And crucially, the city’s compost and yard waste collection was about to resume for the spring, so my neighbors had their maximum amount of organic material awaiting disposal.

Starting with a hole