Categories
DIY How-to Making

Replacing the Logo on a New Era Baseball Cap

My brother recently suggested I could upgrade my hat game. He was right: the crusty, adjustable-strap White Sox hat I’d worn for years was due for replacement. I liked the fit and look of the New Era 59Fifty wool ballcap he lent me. But I didn’t care to advertise for a team (a.k.a. company) I don’t care about, nor did I wish to invite small talk about sports.

My mission: replace the logo on an official New Era baseball cap with one of my own design. It was a fun mixed-media project, part art, part craft, and part hack.

I ordered a gently-used cap from eBay. If you don’t care about team logo, the choices are vast! I purchased a 1990s vintage black hat with a black Yankees logo for $13.

A black vintage Yankees hat, untouched
The original hat, ready for surgery

First I removed the existing logo. I used a seam ripper to slice threads and pliers to yank on loose ones. When removing logos from other garments, I rip stitches from the back, but that wasn’t possible here due to the white backing liner on the inside.

Many of the threads have been picked off
Going…

This part was slow going. All of the yanking with my dominant hand bent the cap slightly. I probably should have done more slicing and snipping and less brute force with the pliers.

Going… (this was messy)

The result wasn’t perfect. A few threads from the logo remained and I pulled out a little material from the hat itself. But it sufficed once I covered it up. I wonder if contrast would have helped. Would a white logo on black hat work better (because the white logo stitches would be easier to selectively remove) or worse (anything left over would stick out)?

Gone! The outline visible here can’t be seen under the new logo.

Next I made the new logo, using the community laser cutter at All Hands Active. I downloaded the Extinction Symbol and loaded it into Lightburn, which auto-traced the outlines. I was ready for the laser.

I cut the logo out of corrugated plastic sheeting, often called Coroplast. Most plastic is unsafe to cut on a CO2 laser, but Coroplast is okay. In Ann Arbor, unscrupulous companies print advertisements on this plastic and illegally place them in the public right-of-way near highway off-ramps and busy intersections.

I considered 3D-printing the symbol. That way I could have controlled its depth – the Coroplast stock is a tiny bit thicker than a New Era-style logo – and added touches like tiny holes through which to sew the logo to the hat. But that would have taken a while to design and print. And I liked the spirit of reusing roadside litter.

The laser burned nearly through and I finished it with an X-ACTO knife.

extinction symbol burned into a plastic sheet
After the laser cutter
shape cut out of plastic sheet
Trimmed with the knife

Next, I wrapped the logo. I used a small bundle of embroidery floss, I believe a 8.7 yard bundle of 6-stranded DMC 25. That was exactly enough for this project.

beginning to wrap the plastic with embroidery floss
Wrapping underway, trying to keep the knots on the back

A crafty friend at Workantile suggested I wrap the logo before attaching it to the hat. Brilliant!
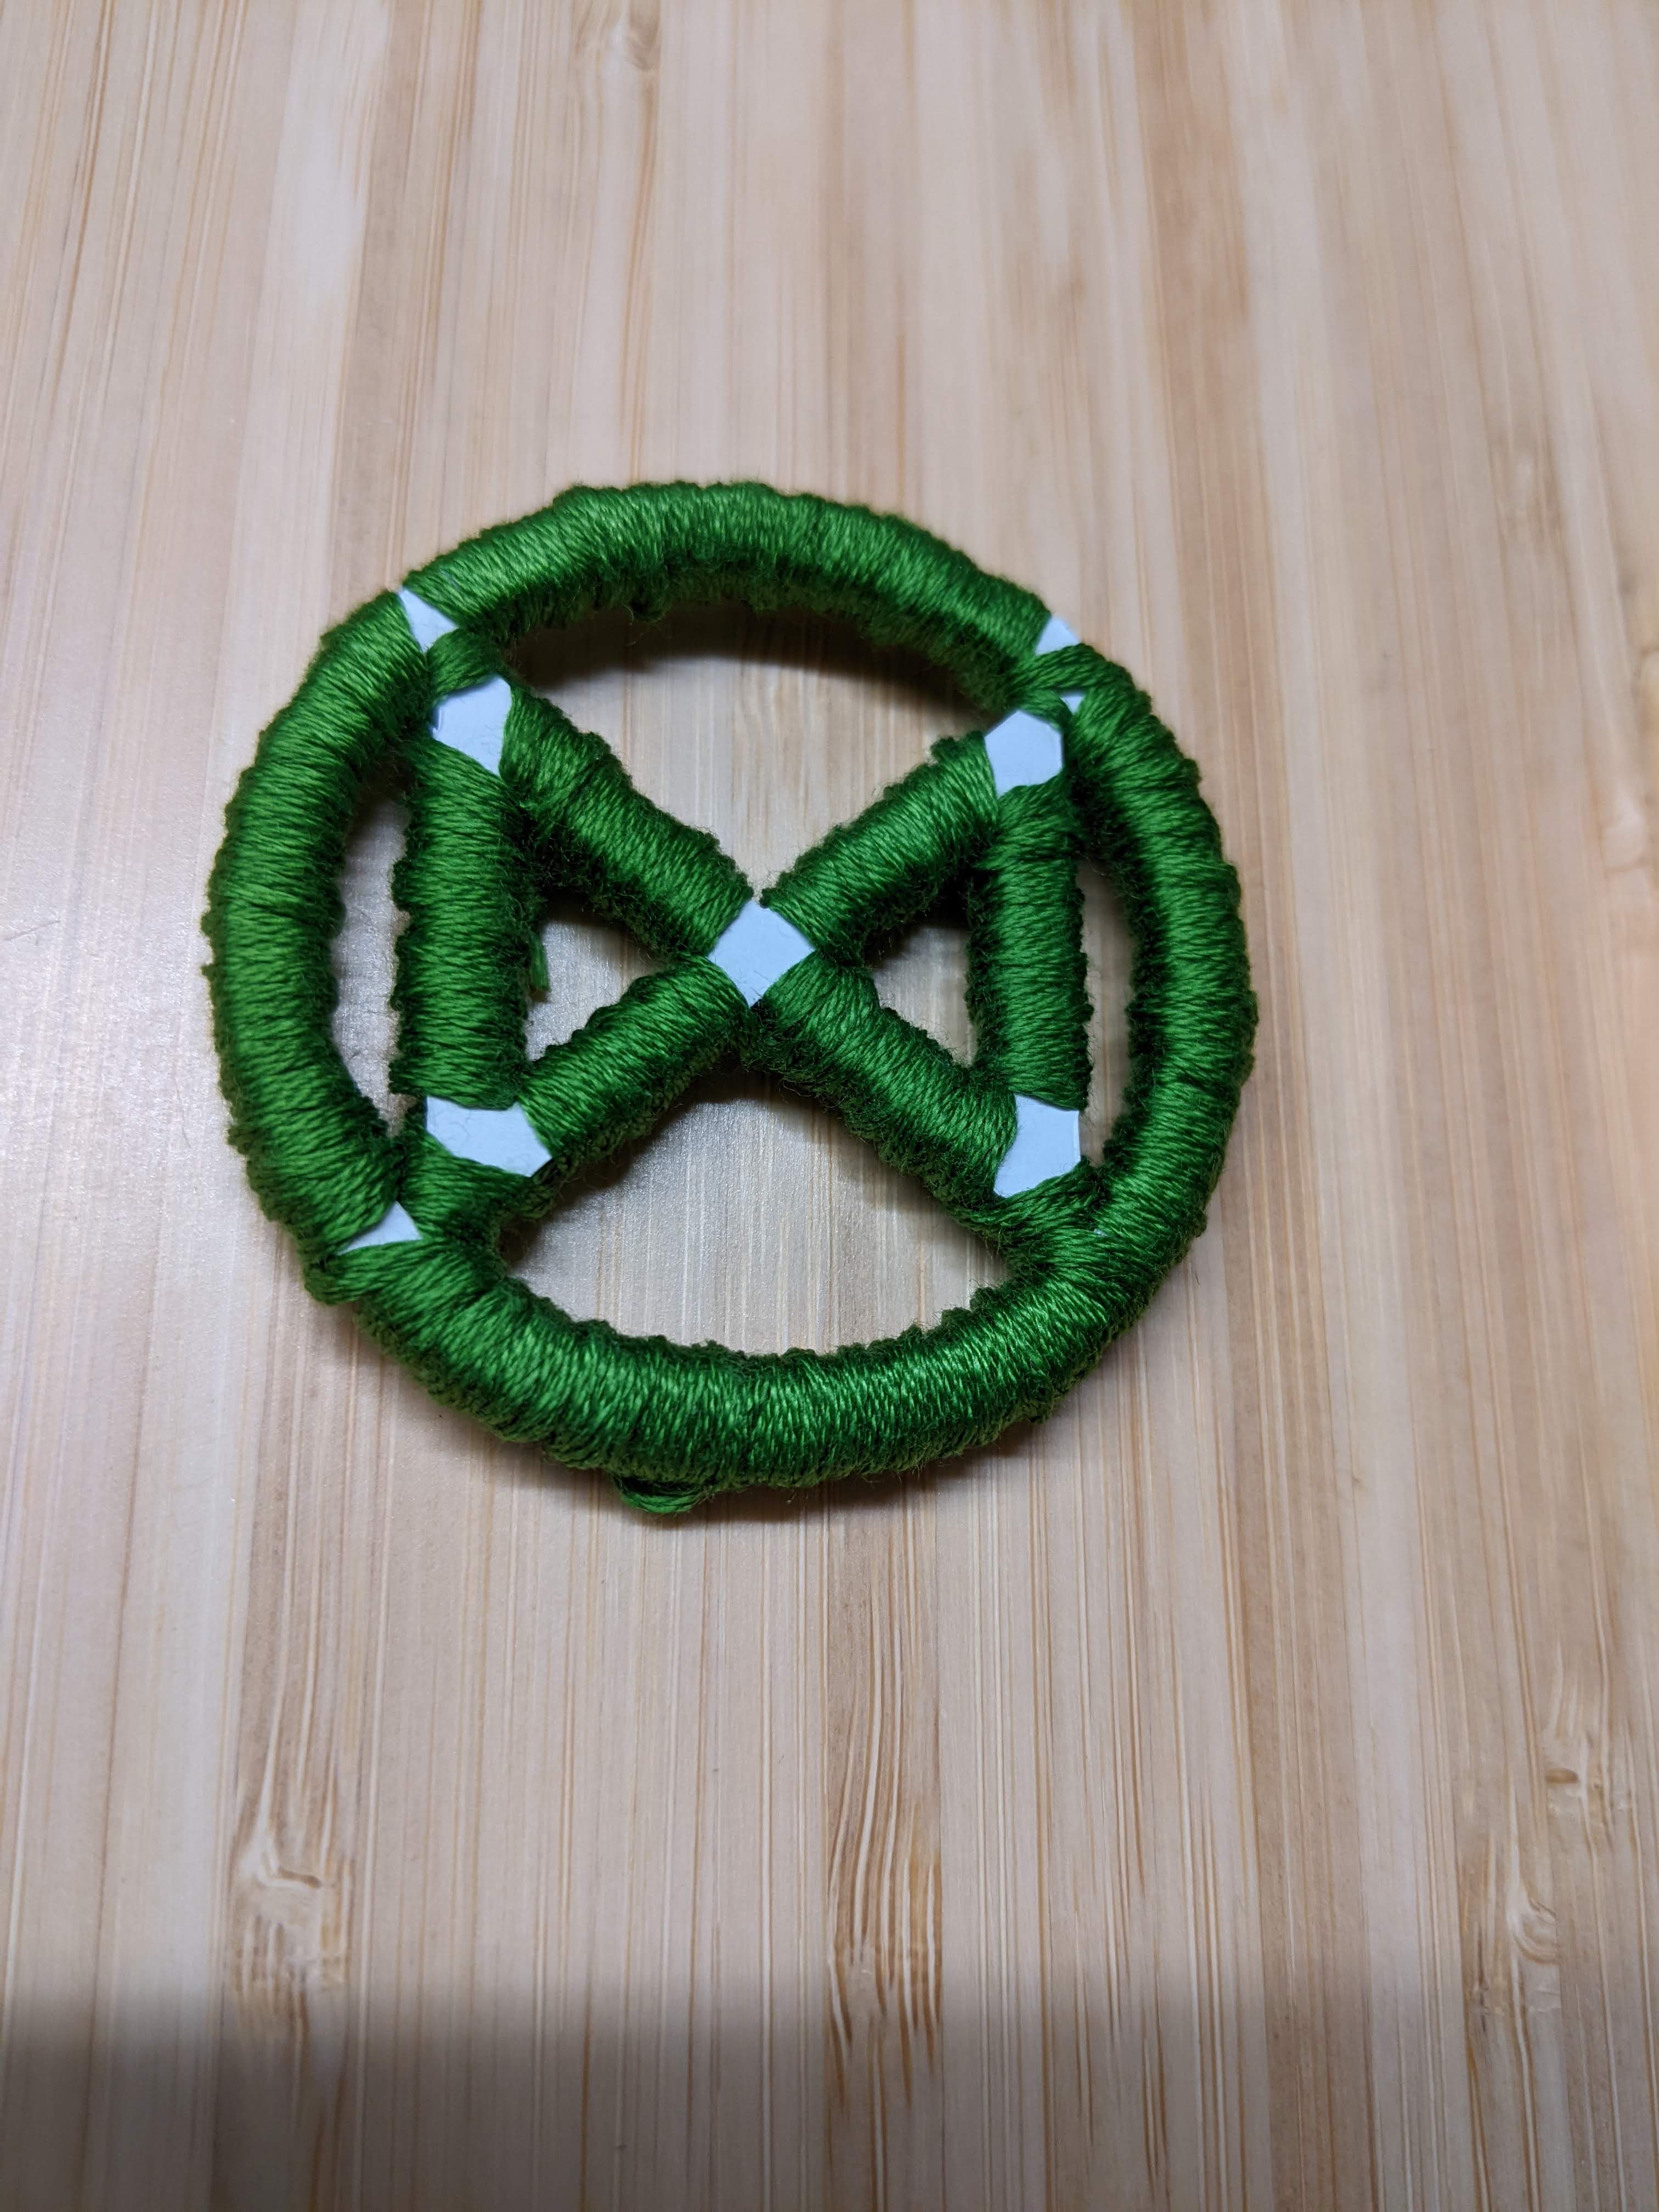
logo almost entirely wrapped
Mostly wrapped
fully wrapped logo sitting on the brim of the hat
Fully wrapped and ready to mount

I got it almost entirely wrapped, then tacked it onto the hat in a few places with the same thread. Finally, I completed a few tricky wrapping stitches that were easier once the logo was anchored to the hat.

The wrapping is imperfect and in one spot I pulled too hard and compressed the plastic. But from across the room it passes for a commercially-made hat!

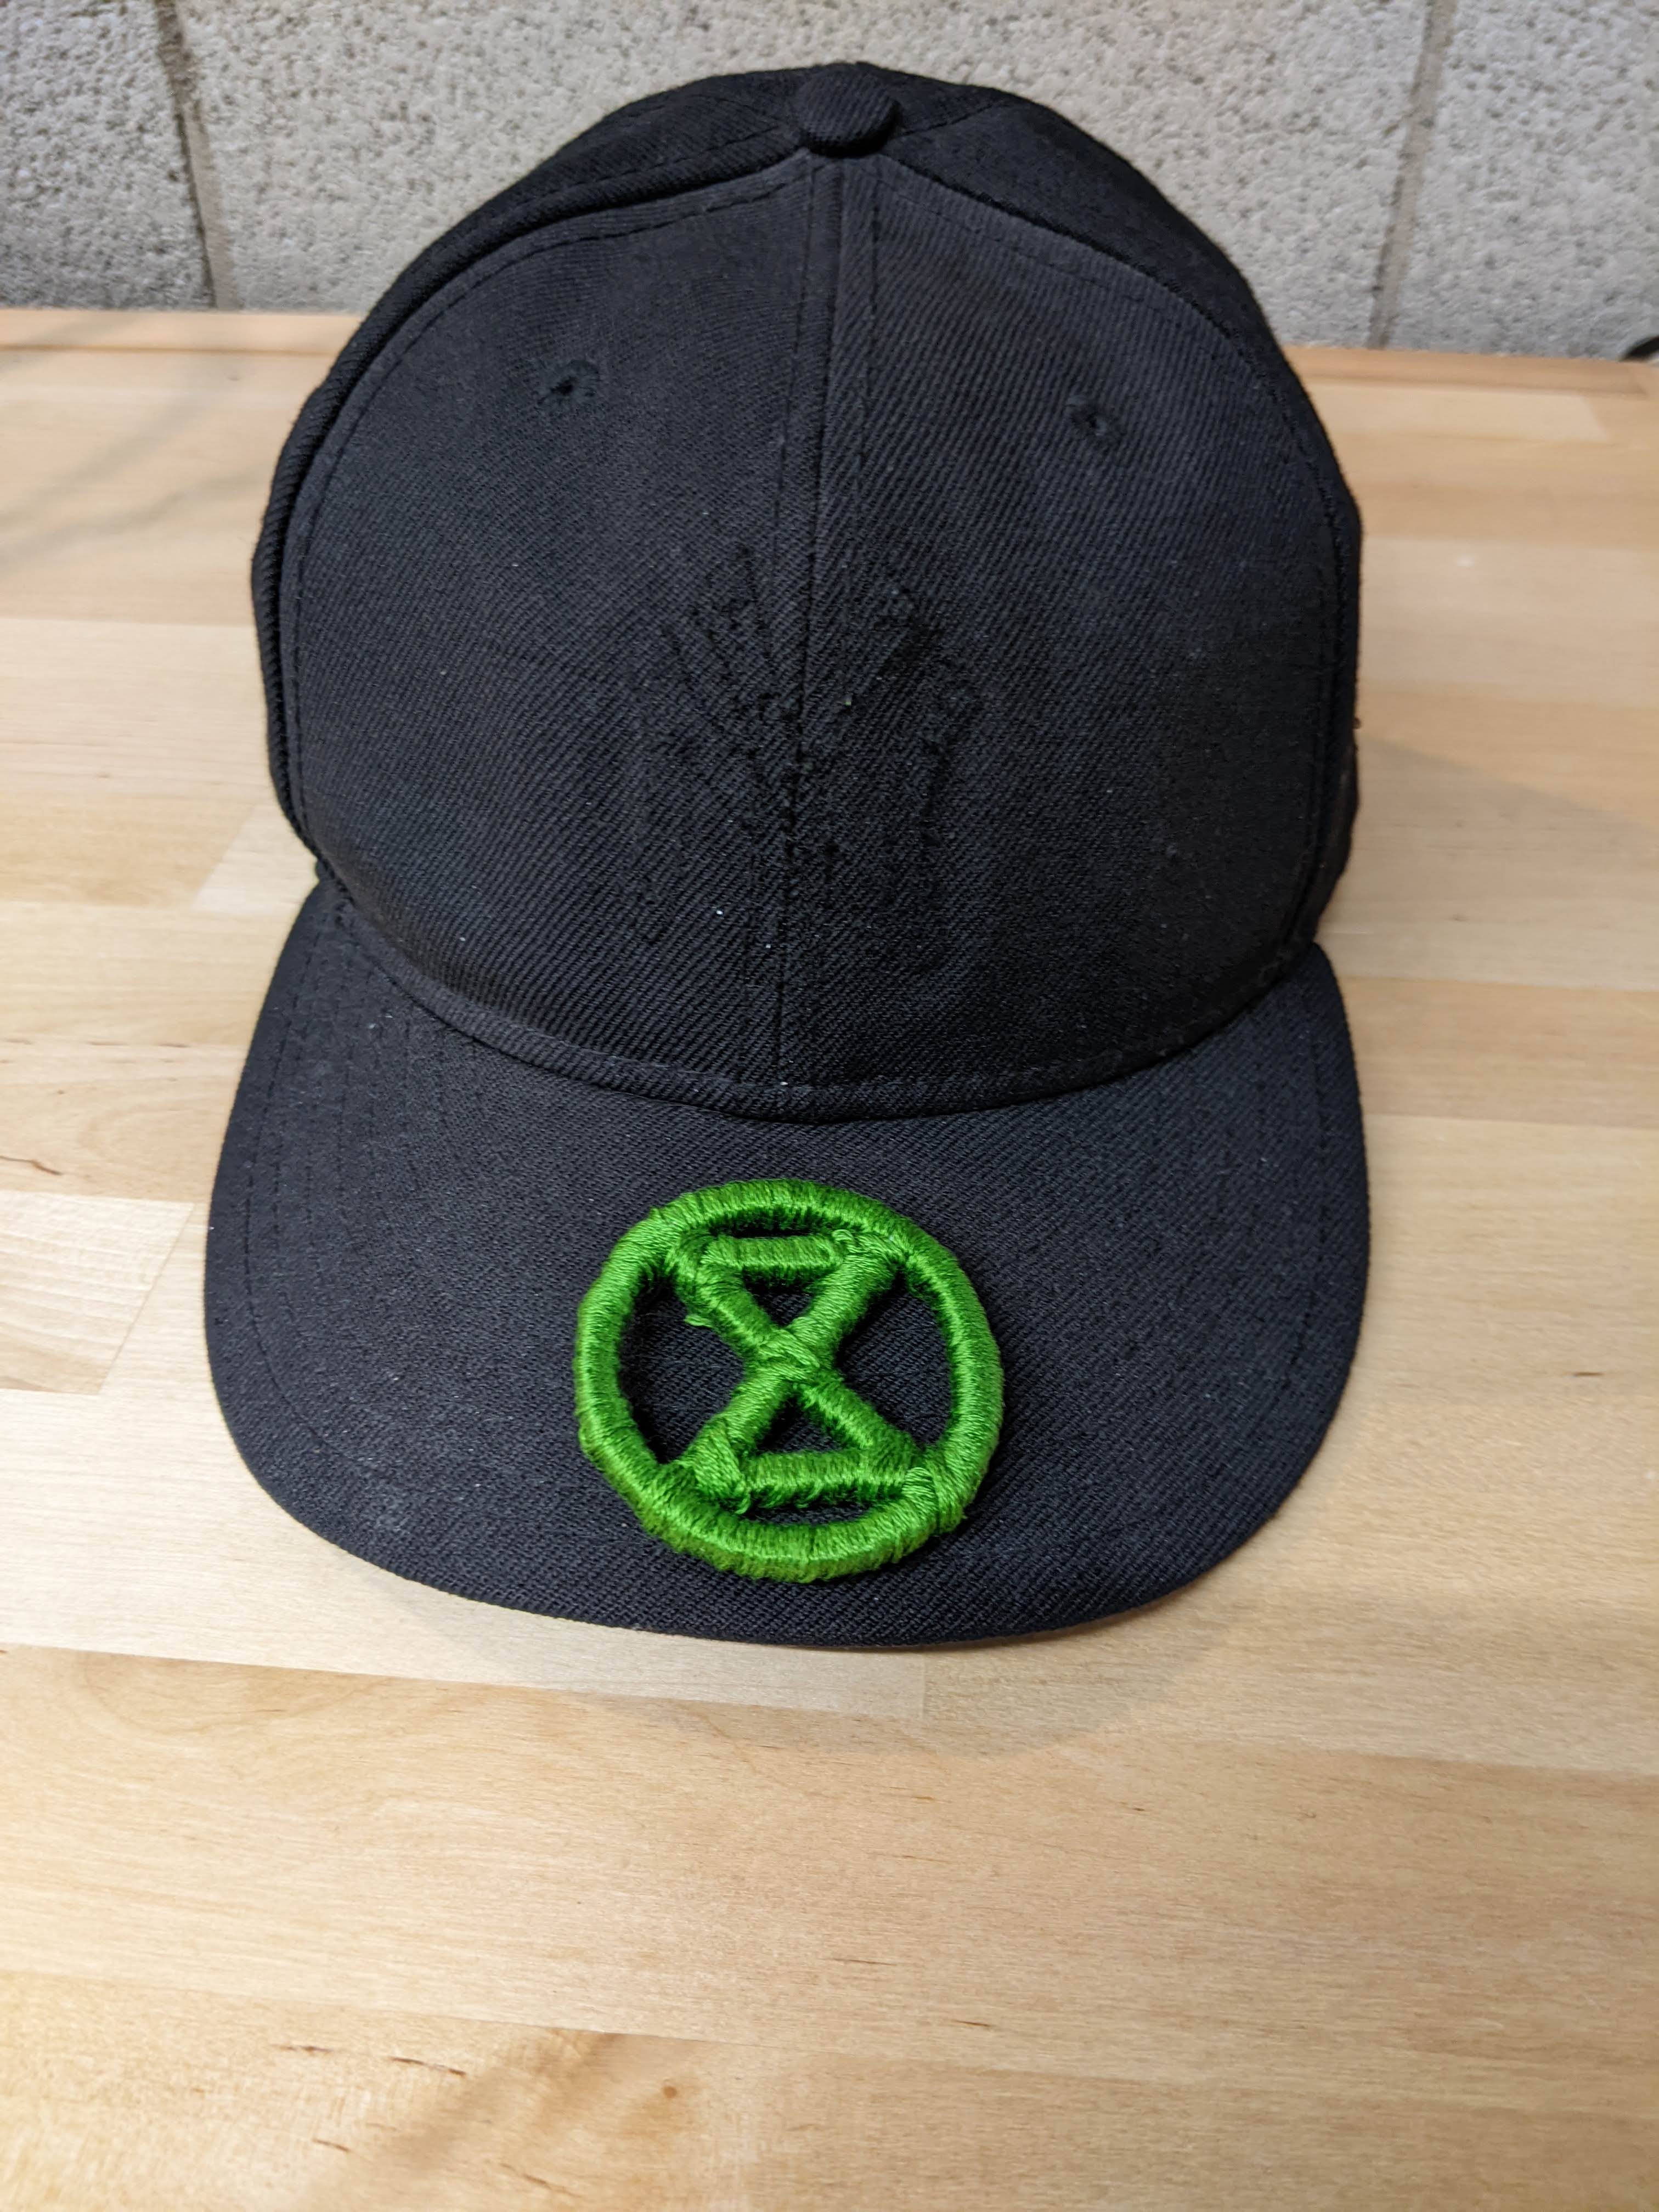
The completed hat with logo finished
The finished product

I’m pleased with how it turned out. I have a comfortable, well-made hat and instead of promoting a sports franchise, I’m starting conversations about living during the Sixth Mass Extinction. Seeing the logo reminds me to think timefully.

If I hack another hat, I’ll consider 3D-printing the symbol to try to precisely match the depth of the hat’s original logo. And I’d start with a hat that isn’t black-on-black so the New Era logo on the side pops: I enjoy the tension and confusion that comes from this being a mass-produced object with a hand-made logo.

Categories
How-to Imagine A World Local reporting Making

Success at All Hands Active Repairsday

This is a love letter to Ann Arbor’s scrappy little downtown makerspace, All Hands Active. In particular, their weekly Repairsday event, which takes place on Thursdays from 6-8pm. And it’s a vignette of how they helped revive a lovely old keyboard/synthesizer.

All Hands Active is a nonprofit. Their mission is educational. I’d argue it’s political, too, though not in the common sense of the word as it relates to electoral politics or parties. Rather, there’s an ethos that you should be free to modify and repair things, that people should help and teach each other, that consumer culture and its quickly-obsolescent, disposable goods are bad, and that knowledge should be free. (Some of that might be me projecting).

So, Repairsday. Any human can bring in an object they’d like to repair. Volunteer AHA members are on hand to help. That can look like advice, diagnosis, or attempting to fix the item together. Sometimes an item can’t be fixed, but that’s okay too. You learn from taking it apart, and for me, knowing that a thing was unfixable – in my case, a toaster that only heated one of its two slots – put me at ease with discarding it.

Last week, AHA Repairsday helped me fix a classic keyboard, rescuing a valuable object from the landfill and giving it a second life.

Categories
DIY How-to Making Nature

Making a coat rack from a buckthorn log

This project hit many of my interests:

  • Eliminating buckthorn, a nasty invasive species
  • Reuse / making things from leftovers
  • Amateur woodworking
  • Contributing to Workantile, the co-working community I’m a part of

It turned out nicely. Here’s a writeup and some photos.

The rack

It started when I was biking home with groceries from Meijer and encountered a big pile of buckthorn by the side of the road, culled from Greenview Nature Area and awaiting pickup for composting. The biggest trunk was a decent sized log. The bike was already heavily laden but fortunately, a log is a different shape than grocery bags so I found a spot for it:

a log on a bike
This was surprisingly easy to haul

For a while I’d been interested in woodworking with found wood, especially buckthorn. I take pleasure in removing it and would enjoy that even more if I could turn it into things. I asked my friend and de facto woodworking coach Chris how I should go about processing logs. Buy a bandsaw? Build one of those circular-saw-converted-to-chainsaw DIY mills I saw on YouTube? Both seemed excessive.

Categories
DIY Making Repair

3D-Printed Piece Saves My Cuisinart Food Processor

The utopian vision of 3-D printing and communal knowledge sharing came true this week, in one small instance. For years I’ve loved the idea of 3-D printing a replacement component when some plastic bit snaps in a machine I’m using. Especially when the manufacturer doesn’t sell that widget and intends for you to junk and replace the whole thing. But in practice, I’ve not found myself in a situation where that would be viable…

Until this week. Last year my mother upgraded her food processor and handed me down her previous model, a Cuisinart DFP-14 (DFP-14BCN to be precise). The machine had seen years of hard work and at last, the little plastic interlock piece at the nexus of the complicated safety mechanism broke.

I spent maybe 90 minutes last weekend trying to fix it. This involved cutting a reinforcement plate out of scrap plastic, epoxying it on, and mounting it with a machine screw (part of the plastic housing had shattered, too). I had tried my best but it was not going to last. Here’s the kludge fix at the point where I called it quits:

The black plastic layer is my addition. This won’t hold up for long.
Categories
DIY How-to Making

Making a wallet out of a bag of chips

I’d liked the idea of making a wallet out of a empty bag of potato chips, but didn’t know how to use a sewing machine. I finally bought one off of Craigslist this winter and am figuring it out. A sewing machine unlocks some projects I’d long been curious about – this is one of them.

I followed the steps from this Instructables guide and it turned out pretty well! I would make this project again. It felt like it dragged on, my 10 year-old helper and I took our time, but if doing this again I could move much faster and complete it in an hour or two. I wonder what the durability of the wallet will be. I plan to use it, so will find out.

It’s fun to think about what part of the design you want on the outside
Categories
DIY How-to Making

Homemade wood toaster tongs

I recently broke a pair of toaster tongs I’d been given. They looked very much like this set ($10):

Magnetic Wooden Toast Tongs
Image belongs to the Vermont Country Store

Complete with the laser-etched phrase and magnet to grip a metal surface. Made from a single piece of wood, with thin tongs, one of the tongs eventually snapped. I generally stick to rough, practical carpentry, but saw these plans from Rockler for DIY kitchen tongs that made this finish carpentry project seem within my reach. And it was! Now I’ll have more confidence tackling polished projects going forward.

I’m very pleased with how mine ended up:

Not perfect, but the imperfections are tolerable!
Categories
DIY How-to Making Parenting Repair

DIY non-slip soles for footed pajamas

I’ve handed down a few pairs of cozy footed pajamas between my kids. Along the way the soles lost whatever non-skid properties they had and became very slippery. We got them out this fall to keep my two-year-old cozy. He was cozy … and he slid all over on our slick floors, wiping out a few times. Neither slips nor cold bare feet would do. It was time for DIY non-slip soles.

I outfitted two pairs of Carter’s footie pajamas. Both attempts turned out great:

Try to slide in those!

Materials: I used a discarded bike inner tube that could no longer be patched. If you don’t have one, you might be able to score them from a bike shop or repair co-op. I also used heavy-duty Sashiko thread and needle, but I expect you could do this with any needle and thread.

Process:

Categories
DIY Making Repair

Mending knee holes with sashiko

I love repairing things. For several years I’ve hoped to take up sewing to extend my fixing skills to clothing. Sheltering-in-place during COVID-19 has provided opportunities to try my hand at mending ripped knees in my family members’ pants. It feels good to sit in peace and make something whole again. Apparently I’m part of a trend, with mending and in particular visible mending gaining in popularity.

I asked my friend Cassie where to start in mending holes in knees and she pointed me to the book Mending Life, which had steps that were thorough, clear, and seemed doable – with handy illustrations (pp. 96-103). So I took a shot at it. So far I’m 3 of 3! None are perfect but all three exceeded my expectations. Below are photos.

Specifically, I have been trying to emulate sashiko, a Japanese decorative reinforcement stitching technique. I sewed the first patch with a piece of thick thread I found in my sewing box. The next two I did with proper sashiko needles and thread I ordered online. (As with most of my things, if you live near me and want to borrow them, just ask).

I chose contrasting thread and patches to emphasize the repair jobs. I’m proud of my work, it normalizes repair and reuse, and frankly I think the unique & visible mends leave the clothing looking better than it did new.

Sashiko patch : women’s jeans

The ripped fabric at the knee was exploding outwards. It was begging to be patched with the “exposed edge technique” (Mending Life), with an interesting pattern poking through.

Categories
DIY How-to Making

Building a compost bin out of pallets

The project: My mother-in-law had long expressed interest in composting her food scraps, but didn’t care for the plastic bins available for purchase. I’d been interested in building such a bin by reusing salvaged lumber, mostly discarded wood pallets. This presented a fun challenge: construct a compost bin that satisfied her aesthetic requirements and followed my principles of reuse.

It turned out well: it’s attractive (in a rustic way) and functional, though took longer to build than I expected. Breaking down pallets was a big chunk of that time overage: they were free in monetary cost but not in the time they took to process.

After weathering its first winter

Design: I built it probably a little too big, 32″ L x 30″ W x 29″ H. Compost bins have to solve for the problem of emptying the finished compost (after a year or so) while leaving in place any recently-discarded food. In bins like this, which will be emptied via a not-yet-installed door in the bottom of the side (see below), that separation is achieved by the depth of the pile. The bottom of the pile, with older finished compost, is no longer turned, while the fresher, unfinished material rests on top. In a narrower bin, the walls support layers of material such that the top layers can be left in place while the bottom is scraped out. This bin may be too big to neatly do that. Perhaps the over-sizing just means it can go a few years between emptying.

Categories
DIY Making

An Excel grocery checklist template

Being in an unfamiliar setting can lead to epiphanies, big and small. Travel is great for this. For instance, I first learned about cargo bikes when I saw one in Brooklyn on a work trip.

In 2012 I stayed in an apartment that had a physical grocery list hung on the kitchen wall. It listed common items – apples, eggs, etc. – and had arrows you could flip to note that you needed something.

I liked the idea. It solves the tricky problem of trying to see in your fridge the things that aren’t there, providing a checklist instead. But you can’t take it with you to cross things off and it’s hard to modify the items as your needs change over time.

So I made an Excel version of this checklist, organized by section of the store and with space to write in custom items. I’ve tweaked it over the years and it’s worked great.

In the spirit of knowledge sharing, I’ve posted it for others to download and adapt. It’s not “open-source” because it’s a Microsoft Excel file. But I share it in that spirit. It should be accessible to regular people who want to make a customized grocery list. I hope someone else can benefit from the time I spent tweaking the formatting!

(don’t judge me for the list contents, everyone is different)